Screen Block (Windows version only)
With the Screen Block
feature, you
can block out all or part of the screen. This screen block is a movable
window that covers all applications that are currently running.
You can move it to reveal what is beneath, or you can create a cut-out transparent shape which reveals what is beneath.
This is useful for presentations where you wish to gradually reveal or hide part of a diagram or slide.
How to open the screen block
Specifying an image file for use as the screen block
Setting the image file back to the default
Setting the transparency
Snapping the screen block into place
Moving the screen block around on screen
Creating a cut-out area to reveal what is beneath
Exiting from the screen block
How to open the screen block
To create the screen block, use the Tools > Accessories > Screen Block menu option.
This creates a gray window that covers the entire screen:

Specifying an image file for use as the screen block
You
can specify an image for use as the screen block. To do this, click on
the screen block window with either the StarBoard pen or mouse, and
select the Open image file... menu option.
This allows you to browse for image files (bitmap formats such as JPEG, BMP or PNG).
Setting the image file back to the default
If you have specified an image file for use as the screen block image, you may wish to reset it back to the default.
Click on the screen block window with either the StarBoard pen or mouse, and select the Use default image menu option.
This will set the screen block back to a gray window.
Setting the transparency
You can specify the level of transparency of the screen block.
Click on the screen block window with either the StarBoard pen or mouse, and select the Set transparency... menu option.
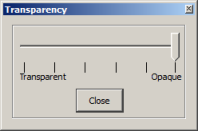
This opens the following dialog box:

Use the slider control to adjust the level of transparency, and click Close to accept your settings.
Snapping the screen block into place
You can specify whether or not the screen block will snap into place when it is moved close to the edge of the screen.
Click on the screen block window with either the StarBoard pen or mouse, and select the Snap to edge menu option.
This is a toggle, so you can turn it off by selecting the option again.
Moving the screen block around on the screen
You can select from a list of 3 options to specify how the screen block can be moved:
- Move freely - selecting this option allows you to move the screen block window about in any direction. This is the default setting.
- Vertical move only - selecting this option allows you to move the screen block window vertically, but not horizontally.
- Horizontal move only - selecting this option allows you to move the screen block window horizontally, but not vertically.
To
select any of these options, click on the screen block window with
either the StarBoard pen or mouse, and select the appropriate menu option.
Creating a cut-out area to reveal what is beneath
There are 2 types of cut-outs you can create to reveal parts of the screen beneath:
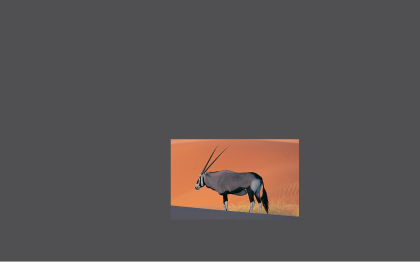
- Rectangular cut-out - selecting this option allows you to create a rectangular transparent area (example below):

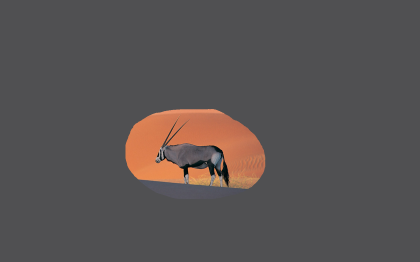
- Freehand cut-out - selecting this option allows you to create a freehand transparent area (example below):

To select any of these options, click on the screen block window with
either the StarBoard pen or mouse, and select the appropriate menu option.
Note: If you click on the transparent cut-out on the screen block window, the menu will not be displayed.
Exiting from the screen block
To close down the screen block window, click on the screen block window with either the StarBoard pen or mouse, and select the Exit menu option.


