Moving/Editing/Deleting objects
Objects on the screen can be moved/edited/deleted.
Single object
- Select
 (Select) from the toolbar.
Selecting Select from the Tools menu also switches to the Select tool.
- Select the object to be moved.
Handles appear around the object, and a MENU button appears next to it.
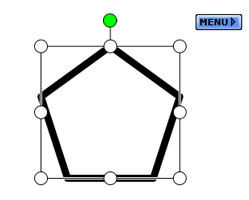
- To move the object, drag and drop it to the desired position.
To resize the object, drag one of the circular handles.
Use the handles at the four corners of the object to keep the aspect ratio.
To cut the object, select Cut from the MENU button.
To copy the object, select Copy from the MENU button.
To duplicate the object, select Duplicate from the MENU button.
To delete the object, select Delete from the MENU button.
To change the stack order of the object, select Order from the MENU button.
Choose either: Step Up, Step Down, To the Top, To the Bottom, To Foreground, or To Background.
To rotate or flip the object, select Rotate/Flip from the MENU button.
Choose either: Rotate Clockwise, Rotate 180, Rotate Counterclockwise, Flip Horizontally, or Flip Vertically.
You can also rotate the object by dragging the extra handle sticking out from the selection box.
* If the selected object is grouped, then Ungroup is shown in the tap menu.
To ungroup the objects, select Ungroup from the MENU button.
This creates selected multiple objects.
Multiple objects
- Select (Select) from the toolbar.
Selecting Select from the Tools menu also switches to the Select tool.
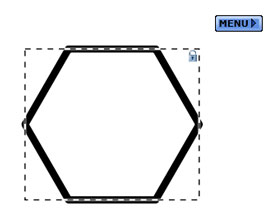
- Select the objects to be moved.
A selection border appears around the objects, and a MENU button appears next to it. No handles are shown.
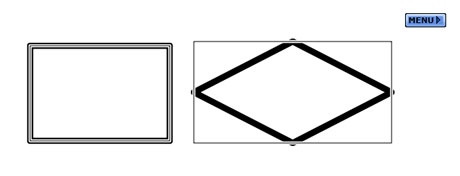
- To move the objects, drag and drop the selection to the desired position.
To cut the objects, select Cut from the MENU button.
To copy the objects, select Copy from the MENU button.
To duplicate the objects, select Duplicate from the MENU button.
To delete the objects, select Delete from the MENU button.
To group the objects, select Group from the MENU button.
This creates one single object.
To change the alignment of the objects, select Align from the MENU button.
Choose either: Top, Bottom, Left, Right, Horizontal Center, Vertical Center, Distribute horizontally, or Distribute vertically.
To resize the object, select Resize from the MENU button
Choose either: Widest, Narrowest, Highest, or Lowest.
To change the stack order of the objects, select Order from the MENU button.
Choose either: Step Up, Step Down, To the Top, To the Bottom, To Foreground, or To Background.
Note: Step Up, Step Down, To the Top and To the Bottom are not available if you have multiple objects selected.
To rotate or flip the objects, select Rotate/Flip from the MENU button.
Choose either: Rotate Clockwise, Rotate 180, Rotate Counterclockwise, Flip Horizontally, or Flip Vertically.
Note: No rotation handle is displayed if you have multiple objects selected.
Locking objects
Objects can be locked to prevent accidental alteration. Objects must be unlocked in order to move/edit/delete them.
- Select (Select) from the toolbar.
Selecting Select from the Tools menu also switches to the Select tool.
- Select the object(s) to be locked or unlocked (as described above).
- To lock the object(s), select Lock from the MENU button.
To unlock the object(s), select Unlock from the MENU button.